This example will show you how to connect to Salesforce as a relational source, using Teiid Designer. It is assumed that you have already installed Teiid Designer version 7.6 or higher.
1. Start your local teiid server instance
-
Teiid Designer requires a running teiid server for Data Preview. We will use the Data Preview capability to test our XML source.
2. In Teiid Designer, import from Salesforce to create models
-
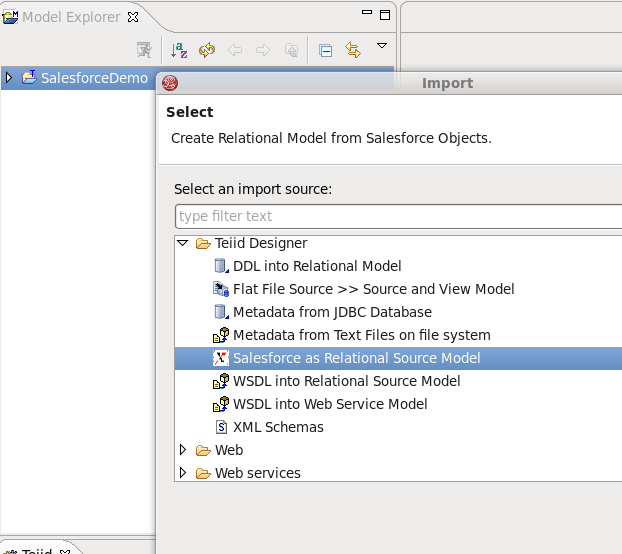
Select File > Import... > Salesforce >> Source Model , then click Next
-
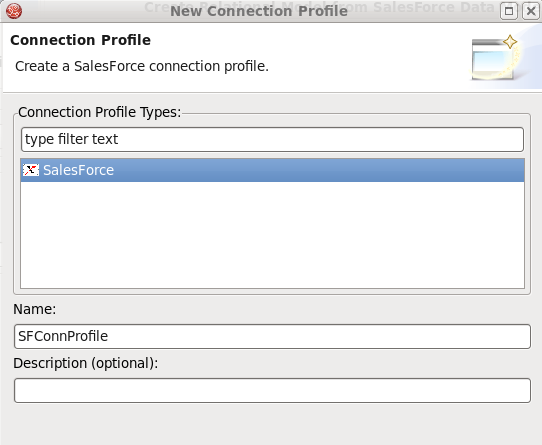
On the 'New Connection Profile' page, Salesforce should be selected. Type in SFConnProfile for the profile Name, then click Next
-
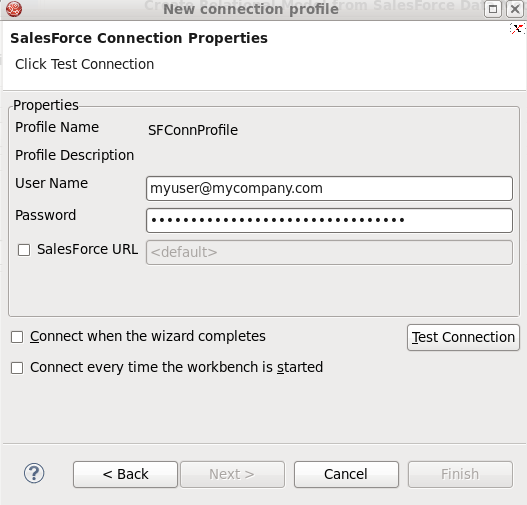
On the Salesforce Connection Properties page of the Connection Profile Wizard, enter your Salesforce User Name <myuser@mycompany.com> and Salesforce Password. The 'Password' is the Salesforce password and security token combination as required by Salesforce. Your Salesforce user must also have API access permission granted in Salesforce. Click on the 'Test Connection' button to verify a successful connection. Click Next.
-
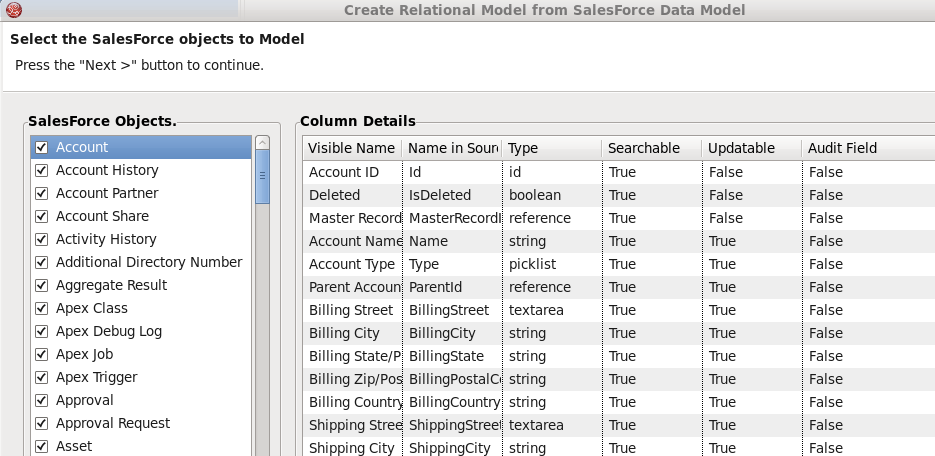
Click Finish on the Connection Profile wizards summary page. Then back in the wizard, on the 'Salesforce Credentials' page, click Next. Assuming a successful connection, the Salesforce metadata will be presented as shown below. On the 'Select the Salesforce objects to Model' page, you can choose the Salesforce Objects that you want to import. For this demo, we will just leave everything checked. click Next
-
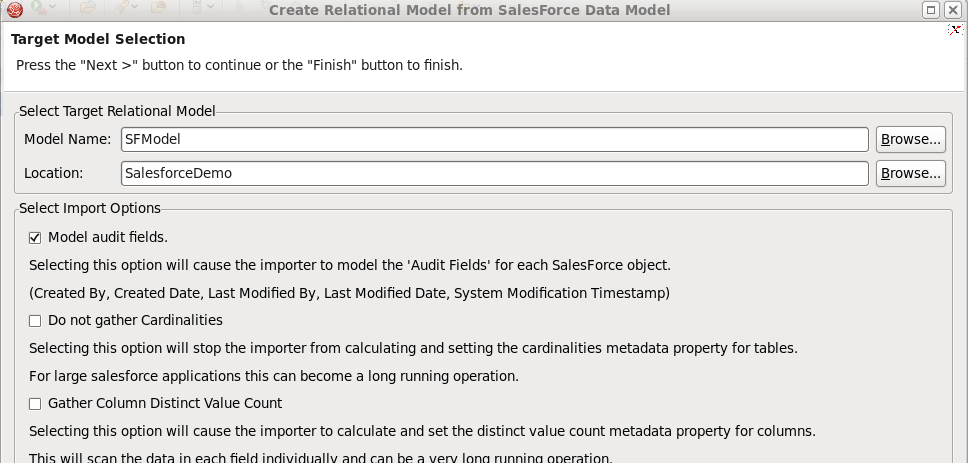
On the 'Target Model Selection' page you are presented with some additional import options. For the Model Name, enter 'SFModel'. Under Import Options, check 'Model audit fields'. Click Finish
-
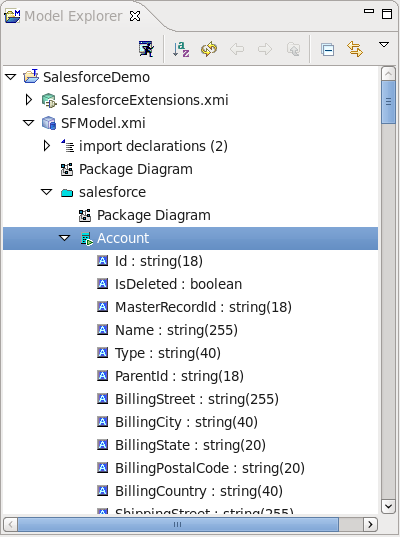
Upon finish, you will see two additional Models in the 'Model Explorer' view, 'SalesforceExtensions' and 'SFModel'. 'SalesforceExtensions' contains model extensions required by the Salesforce translator - it can be ignored. 'SFModel' is the source model which exposes your Salesforce data as a relational table.
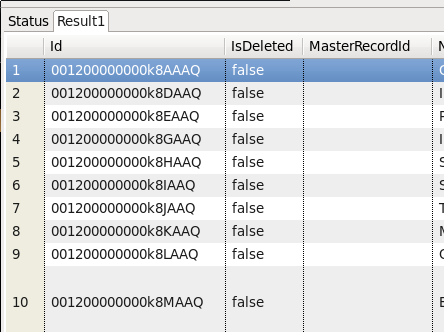
3. To run a test query against the Salesforce Account table, click on it in Model Explorer, then click on the 'running man' icon. You should get a result table of Account data as shown below: